Category Archives: Flat knitting

Baby and the blanket

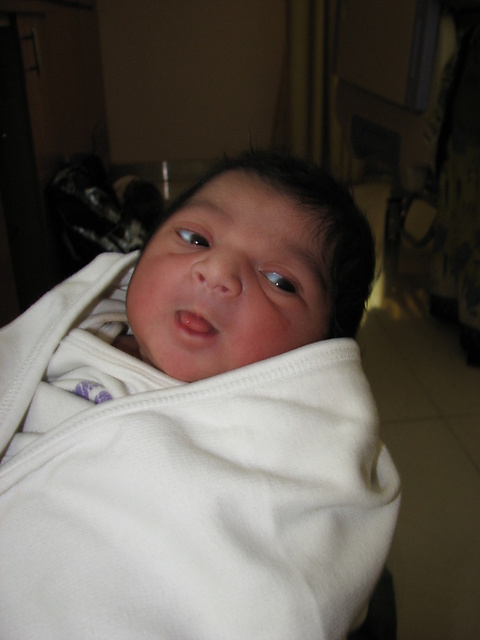
I started working on this blanket when my friend told me she was expecting. I was into a few rows when my baby made an appearance and the blanket had to be kept aside. I picked it up again a few weeks back when I realized my friend is due in the third week of June. I would have finished it on time, if not for the early appearance of the baby. My friend’s immediate family had not yet arrived in Bangalore and the baby decided to give a surprise to everybody. This cutie pie is the reason I could not meet Rima this time. Since my friend didn’t really have any help, I had to be with her in the hospital all day long. Sorry once again Rima, I hope you understand! This is Sanskriti when she was 8 hours old. Don’t miss those pink cheeks!

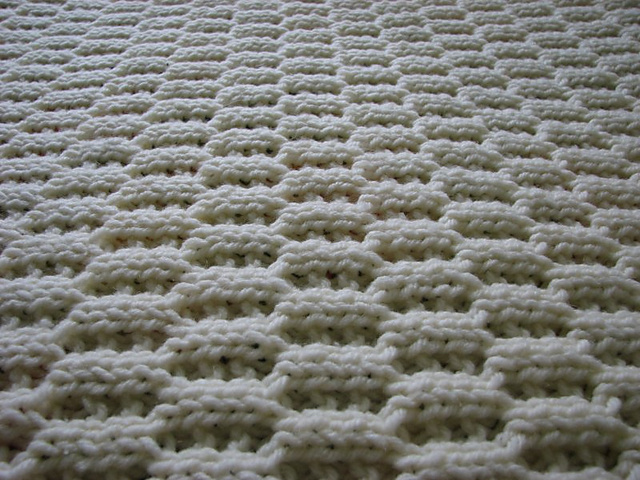
Now about the blanket. This is the classic feather and fan pattern adapted for a baby blanket. I changed the original pattern to make the purl ridges appear every 8th row instead of every 4th row. This makes the feathers sparser and I like this effect.

Original pattern:

Row 1: Knit
Row 2: Purl
Row 3: *K 2 tog 3 times, YO, K1 6 times*
Row 4: Knit

Modified Pattern:

Row 1: Knit
Row 2: Purl
Row 3: *K 2 tog 3 times, YO, K1 6 times*
Row 4: Purl
Row 5: Knit
Row 6: Purl
Row 7: *K 2 tog 3 times, YO, K1 6 times*
Row 8: Knit

I used Vardhaman 4-ply acrylic yarn and held it double to speeden up the knitting. Six feather and fan for a row and fifteen repeats of the 8-row pattern. I was not sure of the gender of the baby, so I used red. Now that I know it is a girl, I am making a sweater for her in pink. Hope it fits.

Rav link for the project.

Baby Blanket

After knitting booties, socks, hats and sweaters, it was time to knit a baby blanket. I started making Tetris blanket but had to frog it. It was time to search for a new pattern again. After scanning through all the patterns on Ravelry (thanks to advanced search feature, it is so so useful), I decided I will have to make up my own. For some reason or the other, I didn’t like any of the readily available patterns. I liked the honeycomb stitch pattern of Sarah’s Honeycomb vest. A swatch turned out well, so the stitch pattern for my blanket was finalized. I decided to do a seed stitch border because I thought it would go well with the honeycomb pattern. Yarn was bought at Surya Emporium, Commercial Street. They have the widest range of 8-ply yarns. A swatch or two, a little bit of math and I had all the stuff required to knit up the blanket.

It took me a month to knit this blanket. I did knit some baby stuff in between, so I knit the blanket on and off. The pattern stitch was easy to remember, only two cable rows in one repeat and most importantly, the cable is easy enough to knit without using cable needles. Knitting Help’s video was really helpful. Now that I finally managed to learn swapping stitches without using cable needles, I don’t want to knit cables in any other way.

Ravelry Project: My Honeycomb Blanket

Pattern: As Sweet As Honey Baby Blanket

The finished blanket measures 29″ x 35″ and it turned out well. I love the texture and the color is perfect for this stitch pattern. There is one small complaint, though. The honeycomb stitch is elastic where as seed stitch is not. So, the blanket is wider at the edges and it looks a bit out of shape. I should have cast on lesser number of stitches for the border and should have increased for the honeycomb pattern. Or else, I should have opted for an elastic border, may be ribbing. I will keep that in mind, but for now I can’t stop ogling at the blanket.

Sock knitting

I have been knitting only baby stuff these days. Continuing with the theme, I wanted to knit a baby cardigan. I received some sock yarn as gifts from Ravelers. We really don’t need socks in this part of the world, so I wanted to knit something else with the sock yarn. Guro’s Twinkle vintage baby cardigan pattern uses sock yarn, so was ideal for stash busting. It is also seamless, so that was another plus point.

I used Knitpicks Memories, Redwood Forest colorway, which was a gift from Jean. The pattern can be used as a template for a yoke cardigan. The body can be knit in plain stockinette or you can use any lace pattern of your own. I knit the vintage lace pattern given in the patterns page for the body. It turned out well but it is not clearly visible because of the multi-colored yarn. It would have looked better in a single colored yarn. I tried knitting the sleeves also in this pattern, but didn’t like the way it looked. Moreover, I thought the cardigan looked cuter without the sleeves, so I chopped them off. The cardigan now has a capped sleeves look which I hope is practical and actually looks like capped sleeves on the baby.
After the sweater was done, I was left with almost a whole ball of yarn. It was time for knitting baby socks. Judy’s Infant socks pattern looked good to me. I hadn’t knit socks before, so I wanted something simple and easy. The pattern is clear, but doesn’t explain the technical details like turning the heel, gusset and instep etc. I followed the Silver’s Sock tutorials which made it easier to follow the pattern. The first sock was done in less than an hour. Thankfully, I escaped from the second sock syndrome and finished the second sock in no time. The second sock is a bit smaller than the first one and I have no idea why. It is still a puzzle for me because at every step, I had the right number of stitch count and row count. Just a matter of gauge, may be?

Knitting socks was fun. After knitting the first sock, there was a feeling of satisfaction and achievement. Knitting socks is like nothing else – you have to knit socks at least once. The technicalities involved – the way you make the heel and then turn it, the way you join this longer heel with the rest of the sock and then knit as one entity – this is almost like magic. I am in awe of the knitter who came up with knitting socks seamlessly. I must say knitters are the smartest people on earth. Whoever said knitting is for old women didn’t know anything about knitting socks.

Bamboozled headband

After thoroughly enjoying Calorimetry, I decided to knit another headband. I wanted to knit something for my nieces-in-law and headband was the best – knits fast and it is useful for girls. I chose Bamboozled because it has cables and I wanted to try knitting cables.

Bamboozled comes with a chart and instructions. I wanted to learn a new skill (reading charts) so I tried that first. For every stitch, I would see the symbol, then see the glossary to see what the symbol means, then figure out whether I am on RS or WS and then knit that stitch. Phew! I tried knitting a few rows using the chart, but I was taking ages to knit a single row. When I realized I am going to be knitting this headband for the rest of the year if I use the chart, I switched to instructions.

Knitting cables is stressful. I would knit a few rows and then realize I goofed up somewhere and start all over again. That’s when I realized the importance of lifelines. They are exactly that – lifelines!  After I started using lifelines, I hardly made any mistake. Isn’t there a Murphy law that says: it doesn’t rain when you take the umbrella with you, but always does when you don’t take it.

In the knitting world, cable and lace projects have high regards. To be considered a real knitter, one has to attempt cables and laces at least once. This headband was my first step into the cable world. If you ask me, I don’t know what is the big deal about cables. Yeah, they are fun to knit, but stressful too. It needs my complete concentration, so I can’t knit cables while watching TV or when I am multitasking. I knit to relieve my stress, but this project actually aggravated it. Also, I didn’t especially like the end product either. When I look at a cable sweater, I don’t go weak in my knees like some knitters do. I don’t mind knitting a cable project again, but I don’t think I like wearing it. I think I am weird!

The amputated Daisy sweater

I plan to visit my in-laws this April. I am always trying to impress them (aren’t we all?) and I wanted to flaunt my knitting skills. I decided to make a sweater for my nephew-in-law (errr…).

This is my first sweater. I chose Daisy because the pattern is simple and beautiful. This sweater is knit in one piece for the body and then divided for front left, front right and back.

I know oh-so-boring grey is not really for kids, but I still used it for two reasons: One, I didn’t know this sweater would turn out well enough for it to be gifted. Second, I wanted to use that yarn. I had loads (and still have 2 skeins left) of it and wanted to use it up.

Once the sweater was done, it looked so plain and boring! I had to spice it up by adding a few daisies (as given in the pattern) and a few borders on the sleeve. I also added buttons made of yarn. These are just decorative – I am going to added “press buttons” for the sweater. Now the sweater is see-able.

Before
After

One daisy out of the three didn’t come out well: I amputated one of its petals. The duplicates stitched border on the sleeves almost represent the Indian flag which was completely unintentional. One border row is so off the track, as if it is drunk – it goes up and down, and up and down. Or was I drunk while knitting it?

As usual, lots to learn. Seed stitch, dividing stitches, raglan shaping, mattress stich for seaming, backstich for the daisies, duplicate stitch for the sleeve border.

All in all, end result: an ok-ok sweater. I think it is good enough, so I am going to give it, after all.

Calorimetry

After completing my last knitting project, Peter Vest, I decided to make something quick and easy. I haven’t knit anything for myself so far, so this time the FO had to be for me! I found just the thing I was looking for – Calorimetry. Easy, knits quickly and is fun to wear. It uses short rows, which I hadn’t used before, so a new technique to learn.

It is knit flat using short rows – work till the desired stitch and then turn your work and resume knitting. For a beginner like me, it was difficult to imagine how the knitted garment was turning and taking shape. If you spend a minute to understand how we achieve the oval shape of the garment, it will be easier for you to knit it without getting confused. It knits quickly. Me, being a newbie, could finish it in to 3-4 hours. Makes a great last-minute gift.

I don’t really like the color I used, but that is the best choice I had. I didn’t have much stash and couldn’t wait to buy new yarn. This project is so cool I am planning to make this for my three nieces.